What is the proper way to handle a gas grill igniter during installation?
Jan 09, 2026
Leave a message
When it comes to installing a gas grill igniter, there are several crucial steps and practices that one must follow to ensure a safe and effective setup. As a supplier of gas grill igniters, I have witnessed firsthand the importance of proper handling during the installation process. In this blog post, I will delve into the proper way to handle a gas grill igniter during installation, providing you with valuable insights and practical tips.
Understanding the Gas Grill Igniter
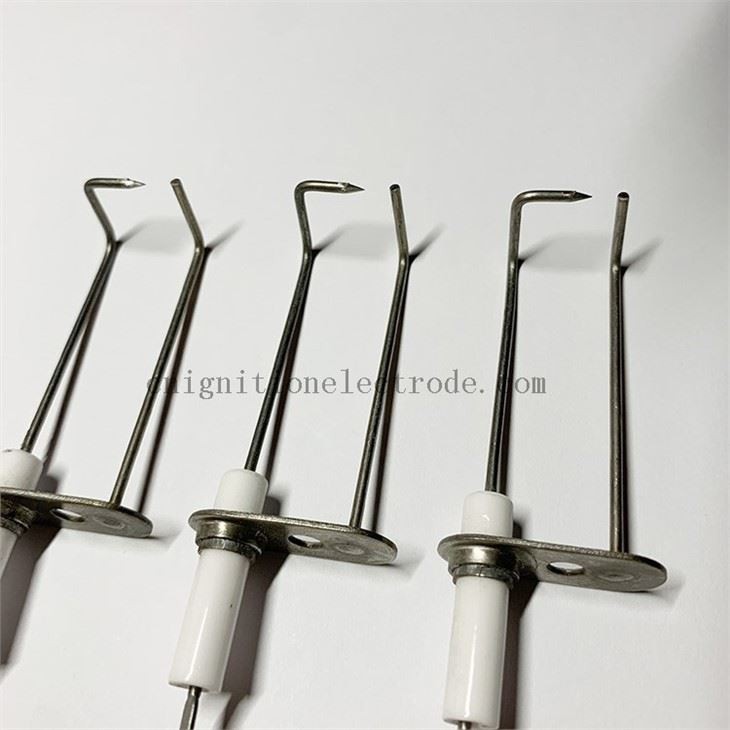
Before we dive into the installation process, it's essential to have a basic understanding of how a gas grill igniter works. A gas grill igniter is a device that generates a spark to ignite the gas in the grill. There are two main types of igniters: piezoelectric and electronic. Piezoelectric igniters use a crystal to generate a spark when struck, while electronic igniters rely on a battery or electrical connection to produce a spark.
Pre-Installation Preparations
Safety First
Safety should always be your top priority when working with gas grills. Before starting the installation process, make sure the gas supply is turned off. This will prevent any potential gas leaks and reduce the risk of fire or explosion. Additionally, wear appropriate safety gear, such as gloves and safety glasses, to protect yourself from any potential hazards.
Gather the Necessary Tools
To install a gas grill igniter, you will need a few basic tools, including a screwdriver, pliers, and a wrench. Make sure you have all the necessary tools on hand before you begin the installation process.
Read the Manufacturer's Instructions
Every gas grill igniter comes with a set of manufacturer's instructions. It's crucial to read these instructions carefully before starting the installation process. The instructions will provide you with specific information about the installation process, including the correct way to connect the igniter to the gas grill.

Installation Process
Step 1: Remove the Old Igniter
If you are replacing an old igniter, the first step is to remove it from the gas grill. Use a screwdriver to remove the screws that hold the igniter in place. Once the screws are removed, gently pull the igniter out of the grill.
Step 2: Prepare the New Igniter
Before installing the new igniter, make sure it is the correct model for your gas grill. Check the manufacturer's instructions to ensure that the igniter is compatible with your grill. Once you have confirmed the compatibility, prepare the new igniter by connecting the wires according to the manufacturer's instructions.
Step 3: Install the New Igniter
Once the new igniter is prepared, it's time to install it in the gas grill. Insert the igniter into the hole in the grill where the old igniter was located. Use a screwdriver to secure the igniter in place with the screws.
Step 4: Connect the Wires
After the igniter is installed, it's time to connect the wires. Follow the manufacturer's instructions to connect the wires to the igniter and the gas valve. Make sure the connections are secure and tight.
Step 5: Test the Igniter
Once the wires are connected, it's time to test the igniter. Turn on the gas supply and press the igniter button. If the igniter produces a spark, the installation was successful. If the igniter does not produce a spark, check the connections and make sure the igniter is working properly.
Handling Tips
Avoid Over-Tightening
When installing the igniter, it's important to avoid over-tightening the screws. Over-tightening the screws can damage the igniter or the grill. Use a screwdriver to tighten the screws just enough to secure the igniter in place.
Keep the Igniter Clean
To ensure the igniter works properly, it's important to keep it clean. Over time, the igniter can become dirty or clogged with debris, which can prevent it from producing a spark. Use a soft brush or cloth to clean the igniter regularly.
Check the Wires Regularly
The wires that connect the igniter to the gas valve can become loose or damaged over time. It's important to check the wires regularly to make sure they are secure and in good condition. If you notice any damage to the wires, replace them immediately.
Additional Products
In addition to gas grill igniters, we also offer a range of other ignition products, including Baking Oven Ignition Electrode, Alumina Spark Plug For Oven, and Ignition Electrode for Gas Oven. These products are designed to provide reliable ignition for a variety of applications.
Conclusion
Installing a gas grill igniter requires careful attention to detail and following the proper procedures. By understanding the installation process, handling the igniter with care, and following the manufacturer's instructions, you can ensure a safe and effective installation. If you have any questions or need further assistance, please don't hesitate to contact us. We are here to help you with all your ignition needs.
References
- Manufacturer's instructions for gas grill igniters
- Safety guidelines for working with gas grills